Grappling with gremlins
Sunday, 1st May, 2011
There are aspects of human endeavour that appear wilfully to defy resolution. Over the last few months, my model has progressed apace, until, that is, I re-engaged with an old adversary.
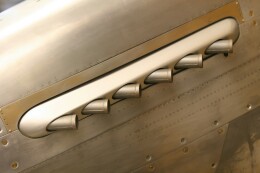
In comparison to their early British counterparts, the visible extremities of the exhaust stubs of the Packard Merlin appear simplicity itself, mere tubes with a ferrule on the end. In reality, forward from the circular apertures, there is a slight flattening and taper involved, yet so slight as to be almost imperceptible with the fairings in place. The latter, however, are not so simple and have some subtle contours and angles that I found challenging, even with the NAA drawing to guide me.
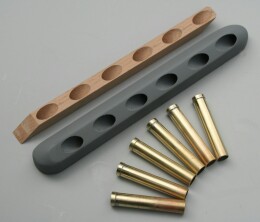
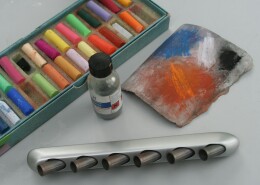
My first attempt in the spring-summer of 2010 looked promising at the time. I managed to carve a reasonably convincing pair of fairings, port and starboard, from mahogany. These I painstakingly hollowed-out, like the twin hulls of a catamaran, as a prelude to cutting the serried teardrop-shaped openings. I fashioned the exhaust stubs themselves from thin walled brass tube and soft soldered the ferrules. I created convincing weld seams with thick Superglue, primed and painted the parts in gunmetal and achieved a satisfactory burned and oxidised appearance by using pastels dusted on with a soft brush. I repeatedly primed and sanded the carved wood until not a trace of grain remained, preparatory to applying Alclad II cellulose lacquer – the best spray applied metal finish I know. So far, so good.
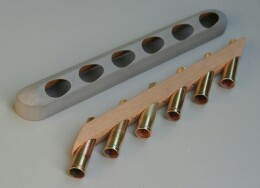
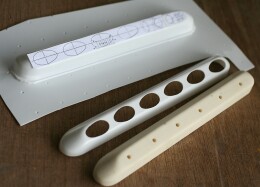
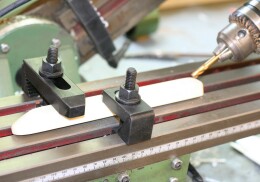
The next challenge was to mount the stubs so they would be perfectly aligned and at the correct rake in both horizontal and vertical plane relative to the engine cowlings. Here my milling machine came in handy, enabling me to bore six holes in each of two lengths of beech wood moulding, and at exactly the correct angle and pitch. With the stubs assembled into the beech retainer, I was able to offer the entire assembly into the hollow fairing and glue it in place. The result looked convincing enough, and I allowed myself some congratulation on a tricky task overcome.
Then came winter, and hairline splits appeared in my beautifully carved mahogany. It was simply too thin to resist the changes in temperature and encroaching dampness. I should have known better. I contemplated trying to fill and hide the damage, but what for? Likely as not, it would only reappear somewhere else. In disgust I put the failed attempt aside and got on with other things, knowing that I would have to resort to vac-forming the exhaust stack fairings in polystyrene.
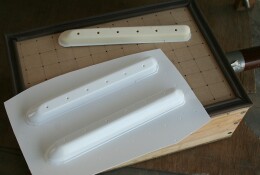
I returned to the fray last month, hoping that if I could separate the original stubs from the fairings, I could make a resin casting of the latter and thereby avoid the unwelcome prospect of carving new patterns. The copious Superglue I had used threatened this quick fix, yet with perseverance and a small routing tool I was able to conduct the surgery without irreparable damage. With the apertures in the liberated fairings filled with Plasticine, I poured a rubber mould and produced two usable castings.
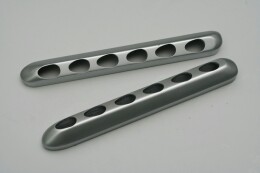
I have described my DIY vac-form process elsewhere, and here the Gods were smiling, for I got a perfect result first time. Within a couple of hours I’d marked, cut out and cleaned up the twelve tear-drop apertures and I was ready for the painting. Alclad II comes in numerous subtle shades. Polished Aluminium seemed to match best, and for this a gloss black undercoat is recommended. I’ve done it both ways, grey and black, and the latter really does give extra depth and tone to the finish that is remarkably realistic.
My resin vac-form patterns performed a dual function as proxies for the beech-wood retainers and also as pre-formed internal reinforcing for the flimsy styrene. With ten out of the twelve original stubs salvaged, and two replacements made and ornamented, the job came together without hitch. Wonder of wonders, both assemblies fitted like a glove into their respective cowlings!
Time to open a can of beer and step back and admire!
Yet even as I congratulated myself at the close correspondence between my handiwork and reference photographs, it dawned on me that something was not quite right with the relative positions of stubs and cowling fasteners. My first thought was that the fasteners were in error, but no: Unbelievably, when marking out the fairings, I had sighted the line of holes, both port and starboard, about 3/16 in. too far back! Inevitably, part of me urged compromise on the grounds that few would ever notice, while my other half fought back, brandishing the spectre of the ‘slippery slope’. In the end, I binned version-two and started yet again.
Vac-form box, milling machine, spray kit… the sequence was becoming familiar. So were the gremlins: While dusting off my bench, I also dusted one of the fairings to the floor. Fortunately, damage to the touch-dry paint was minor. The assembly stage goes well, and I get as far as permanently fixing the port fairing. Next morning, I assemble the starboard counterpart and, as a final touch (belt and braces), add a few drops of thin cyano’ to ensure the stubs are secure. Now this piece too is ready to fix to the aeroplane… Well, it would have been, except an inglorious run of glue has somehow manifested itself over the beautiful aluminium finish!
My feelings at this stage will need little description. During my formative years as a model maker, negative emotions might well have engendered a violent reaction that would have brought the project to a premature end. Fortunately, I have matured sufficiently to walk away while the blood pressure re-stabilises!
Predictably, my attempts to rectify the damage resulted in exacerbating it. What’s more, at this point I ran out of polished aluminium lacquer. Hannants, my only locally accessible supplier, told me they had also run out of polished aluminium lacquer and could not say when they would be replenished. In the meantime, I had primed and re-sprayed the offending piece gloss black, only to watch it develop a mild case of the orange peels.
I put the job away and turned instead to the rudder. Sometimes the only way the defeat the gremlins is to starve them out!
Previous post

A pause to look back
Next post

Assembling the fin and tailplane

