Lining and detailing the wheel wells
Sunday, 21st August, 2016
Two years or more have passed since I last gave serious attention to the wings of my model, so when I inspected them in mid-June this year the layer of muck and spider silk that they had accumulated came as no surprise. Despite my trepidation they seemed fine, and when I trial fitted them to the fuselage the fit remained every bit as good as before.
Sometime soon I will need to install the wings permanently, but in the meantime several jobs require attention, starting with the wheel wells.
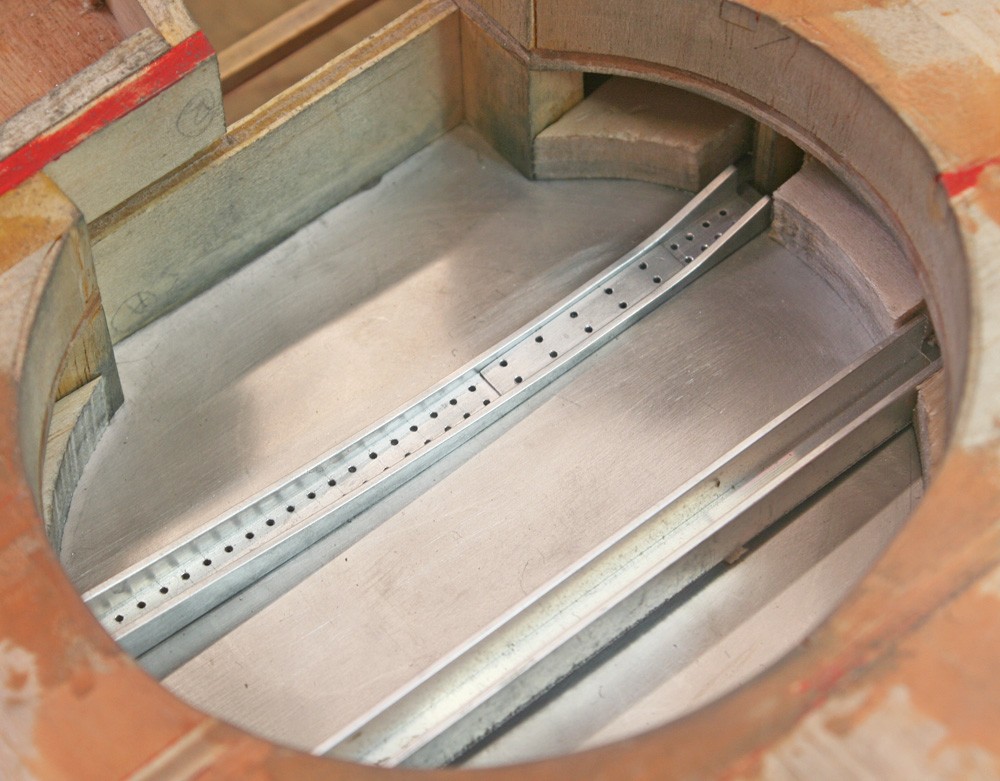
I had installed the litho-plate top skin some time previously, but now I wanted to finish the job, and the first task was to make and fit the two prominent overarching wing rib members (ribs 6 and 7), or at least that part of them that would be visible.
Each rib is effectively a U-shaped member, and each sheet metal arm of the U has an outwardly orientated stiffening flange formed into it. Now this would be technically possible, but given that each one of four patterns needed is different, I decided I just did not have the years remaining in my life, so I settled on a shortcut.
It so happened that I had in stock some H-section aluminium extrusion, the overall width of which was within a millimetre of the scale width of the rib assemblies. Moreover, the thickness of the aluminium was almost exactly scale width of the problematical flanges, so when viewed more or less square on the effect would be the same.
Thus I simply cut and filed the H-section to a U-section, transferred the rib profiles to the flanks of the work-piece (each side differs) and cut and filed the shape. As to the fore-aft curvature required to fit the top wing camber snugly, I imparted this by brute force: In short, I bent the piece to shape!
With the outboard edge of each limb left sharp, the inboard edges rounded off and the bases drilled for copious and conspicuous rivet detail, the simplified ribs pass muster, and only the keenest of critics craning under the wing would spot the compromise.
The next operation also involved compromise, but for a different reason: Wing rib 5 effectively forms a throat where the near circular wheel well opens into the neck formed by the olio leg channel. This rib is plated over on its outboard side and further embellished with reinforcing plates and other structural detail. The problem is that the over-scale thickness of the top wing skin is sufficient to distort the depth-width proportionality of the piece, hence when it came to applying the detail, things did not quite work out, although it would take an expert to tell.
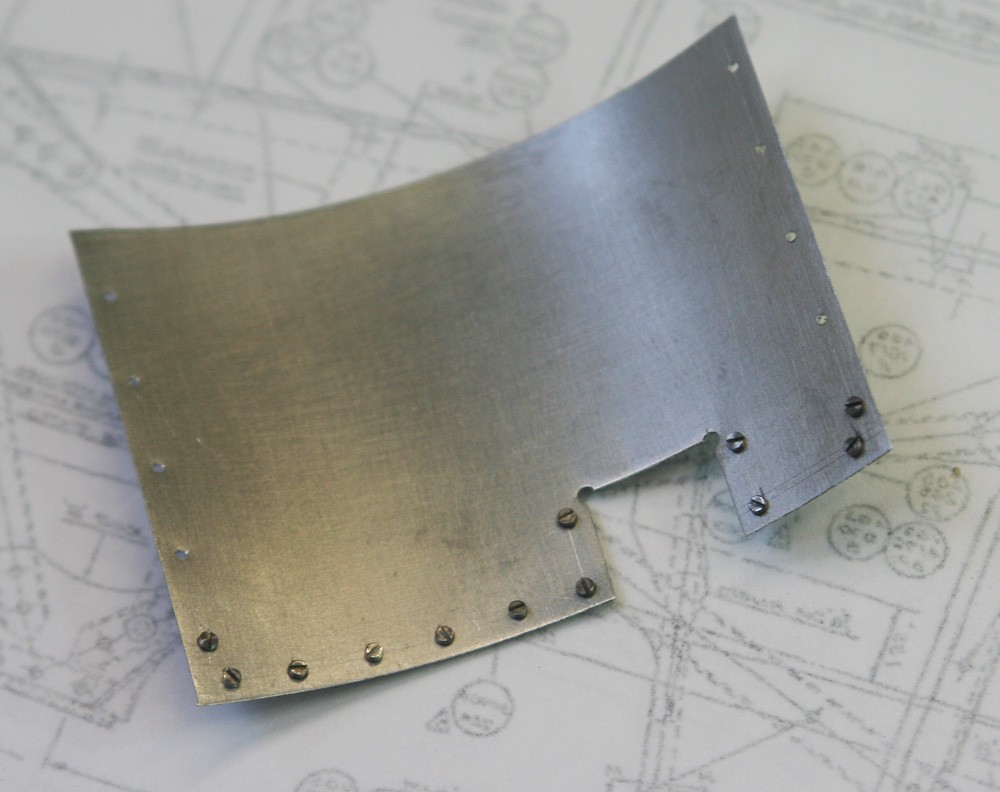
Finally I installed the sheet metal liners that form the encircling walls of the wheel well, but first I had to build up a solid foundation by gluing a sequence of pre-formed balsa blocks to the top-skin. Fortunately, the circular lining is made up of three separate pieces with an additional two small flat pieces on either flank. This makes cutting and fitting a lot easier than it would otherwise be; even so, considerable care and trial and error is required to get a good, tight fit in all orientations, not least where the liners are cut away to accommodate the ribs. It is important, of course, to install the liner sections very slightly over-depth and to file and sand the excess metal flush with the bottom wing once the glue is dry.
In the full size aircraft the removable wheel well liners are secured by dome headed screws, and I drilled most of the holes for these prior to fitting the skin sections – the exception being those around the periphery of the bottom wing skin, which are easily inserted at the finishing stage.
As usual I used EvoStik contact adhesive for this job, reinforced with cyanoacrylate where beneficial. In a cramped space with lots of corners, it is impossible not to get glue residue on the finished metal surfaces. It is advisable, therefore, to have handy a supply of Acetone. It really does remove superglue even when set hard, and it takes EvoStik off in a trice.


